1. Go to GitHub page of your fork and review the add-intro PR you created previously in [
Tools → Git & GitHub → Create PRs] to simulate the PR being reviewed by another developer, as explained below. Note that some features available to PR reviewers will be unavailable to you because you are also the author of the PR.
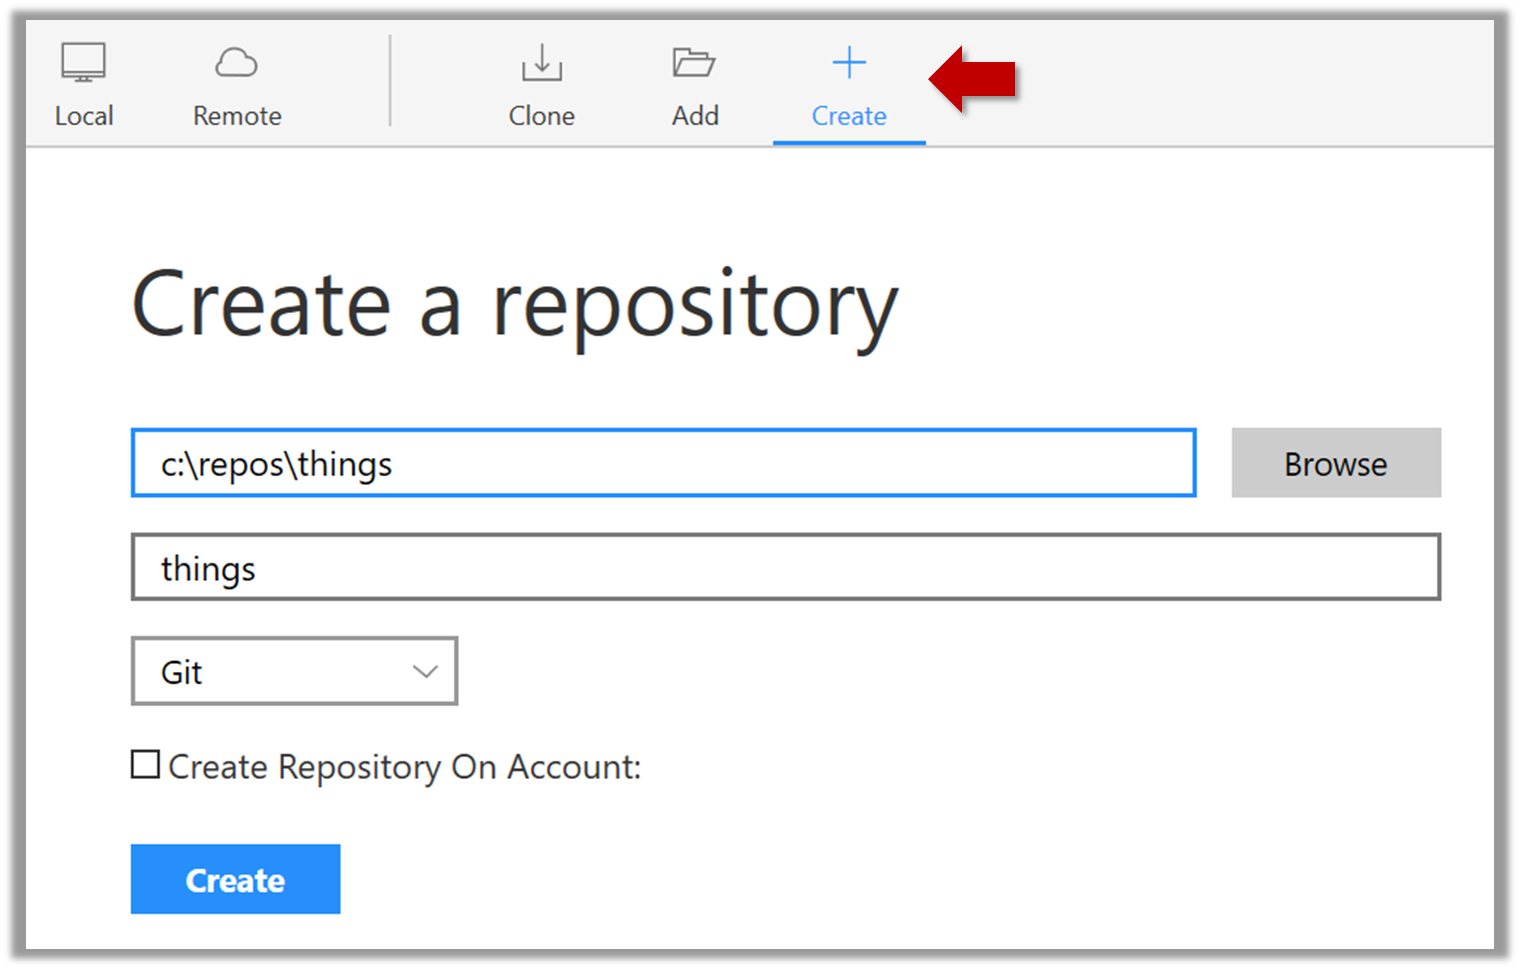
1. Fork the samplerepo-pr-practice onto your GitHub account. Clone it onto your computer.
2. Create a branch named add-intro in your clone. Add a couple of commits which adds/modifies an Introduction section to the README.md. Example:
# Introduction
Creating Pull Requsts (PRs) is needed when using RCS in a multi-person projects.
This repo can be used to practice creating PRs.
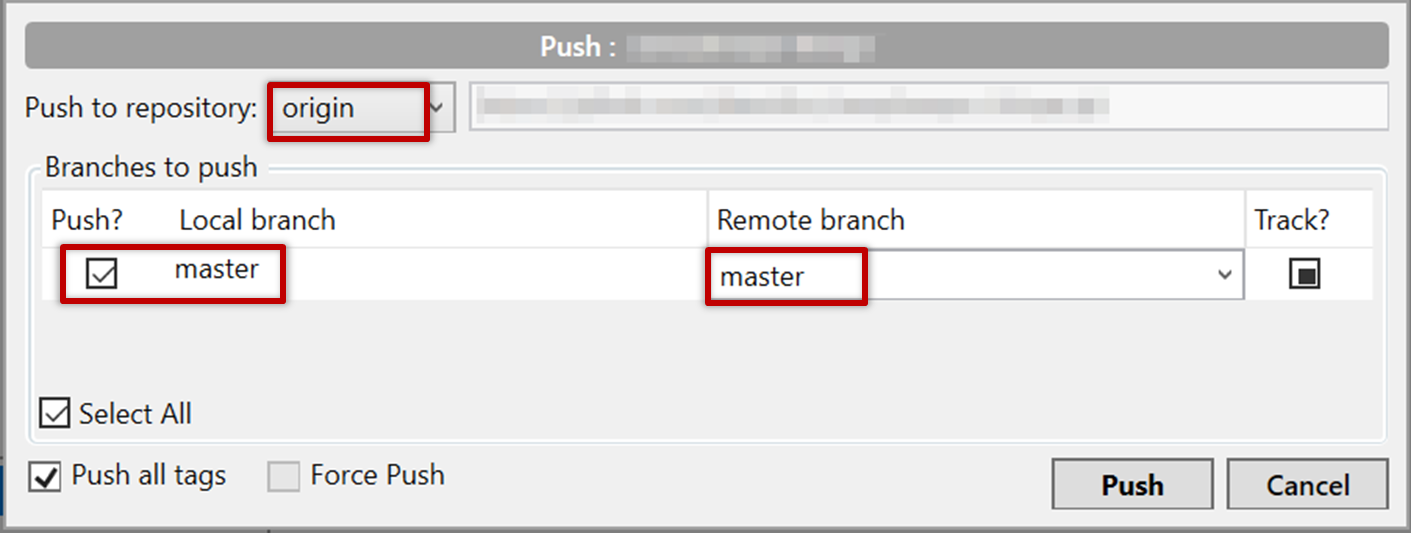
3. Push the add-intro branch to your fork.
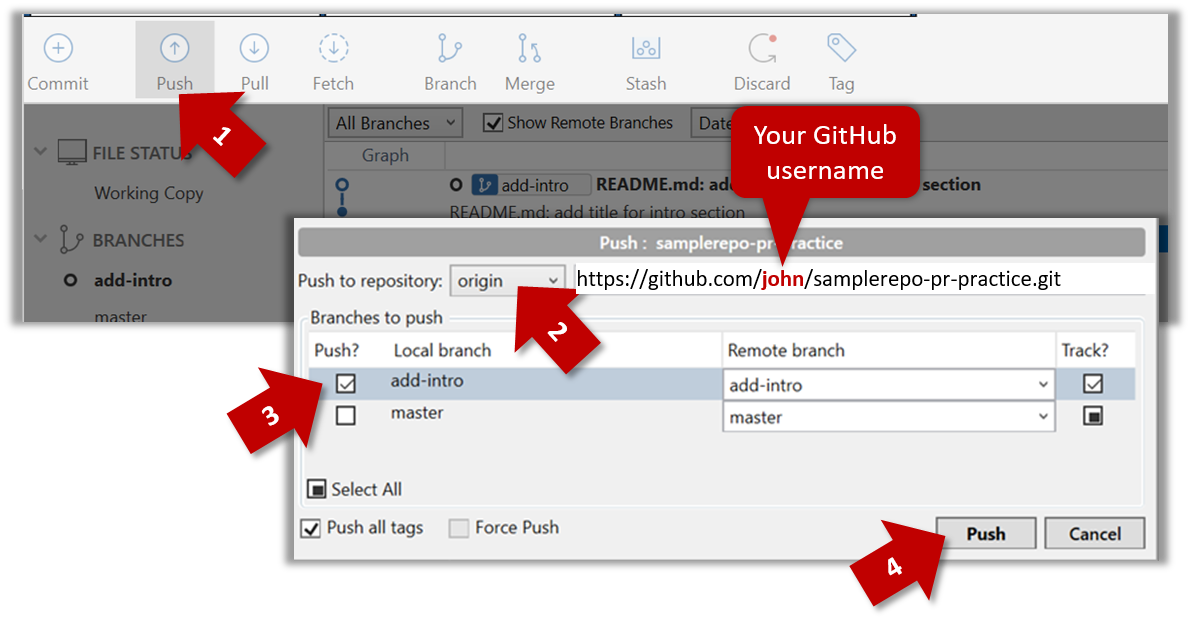
git push origin add-intro
4. Create a Pull Request from the add-intro branch in your fork to the master branch of the same fork (i.e. your-user-name/samplerepo-pr-practice, not se-edu/samplerepo-pr-practice),
as described below.
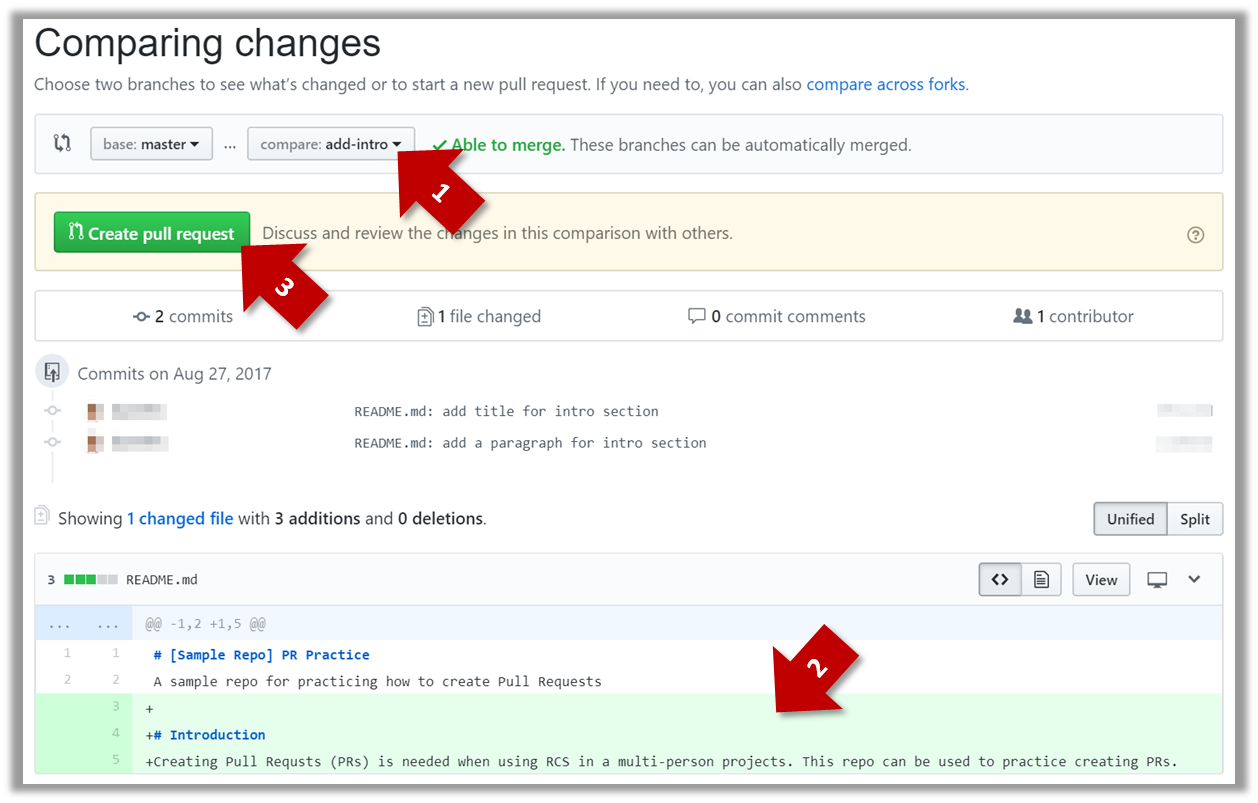
4a. Go to the GitHub page of your fork (i.e. https://github.com/{your_username}/samplerepo-pr-practice), click on the Pull Requests tab, and then click on New Pull Request button.

4b. Select base fork and head fork as follows:
base fork: your own fork (i.e. {your user name}/samplerepo-pr-practice, NOT se-edu/samplerepo-pr-practice)head fork: your own fork.

The base fork is where changes should be applied. The head fork contains the changes you would like to be applied.
4c. (1) Set the base branch to master and head branch to add-intro, (2) confirm the diff contains the changes you propose to merge in this PR (i.e. confirm that you did not accidentally include extra commits in the branch),
and (3) click the Create pull request button.
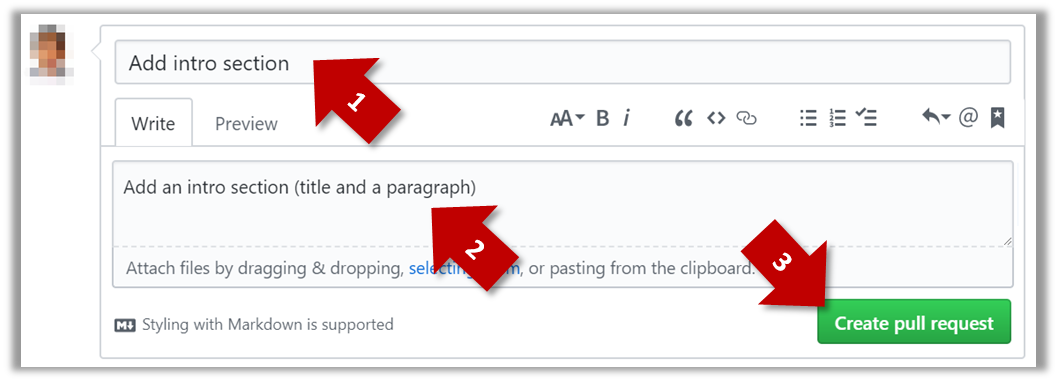
4d. (1) Set PR name, (2) set PR description, and (3) Click the Create pull request button.
A common newbie mistake when creating branch-based PRs is to mix commits of one PR with another. To learn how to avoid that mistake, you are encouraged to continue and create another PR as explained below.
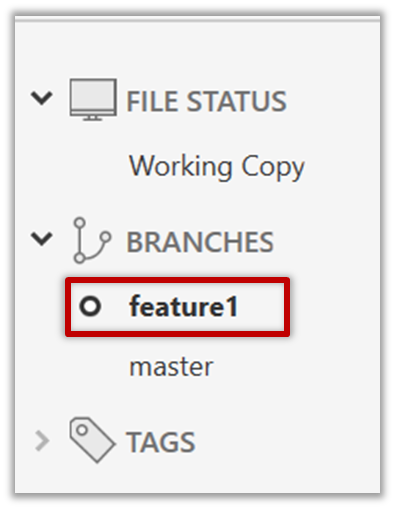
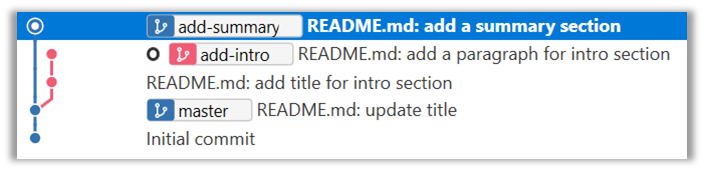
5. In your local repo, create a new branch add-summary off the master branch.
When creating the new branch, it is very important that you switch back to the master branch first. If not, the new branch will be created off the current branch add-intro. And that is how you end up having
commits of the first PR in the second PR as well.
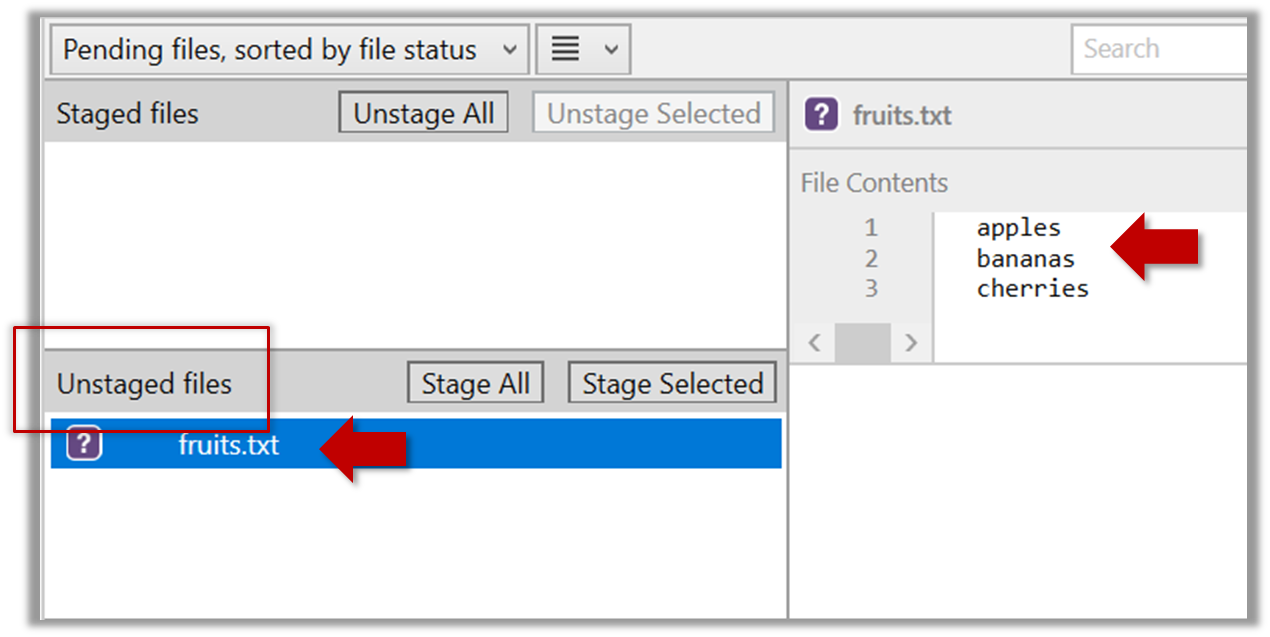
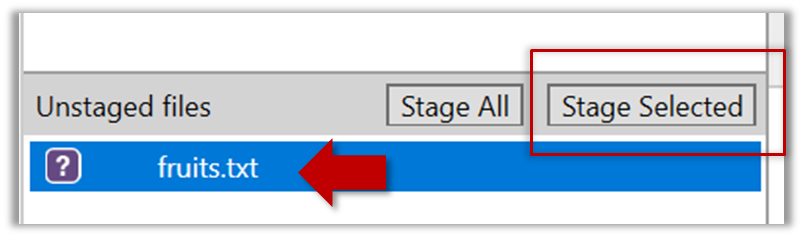
6. Add a commit in the add-summary branch that adds a Summary section to the README.md, in exactly the same place you added the Introduction section earlier.
7. Push the add-summary to your fork and create a new PR similar to before.
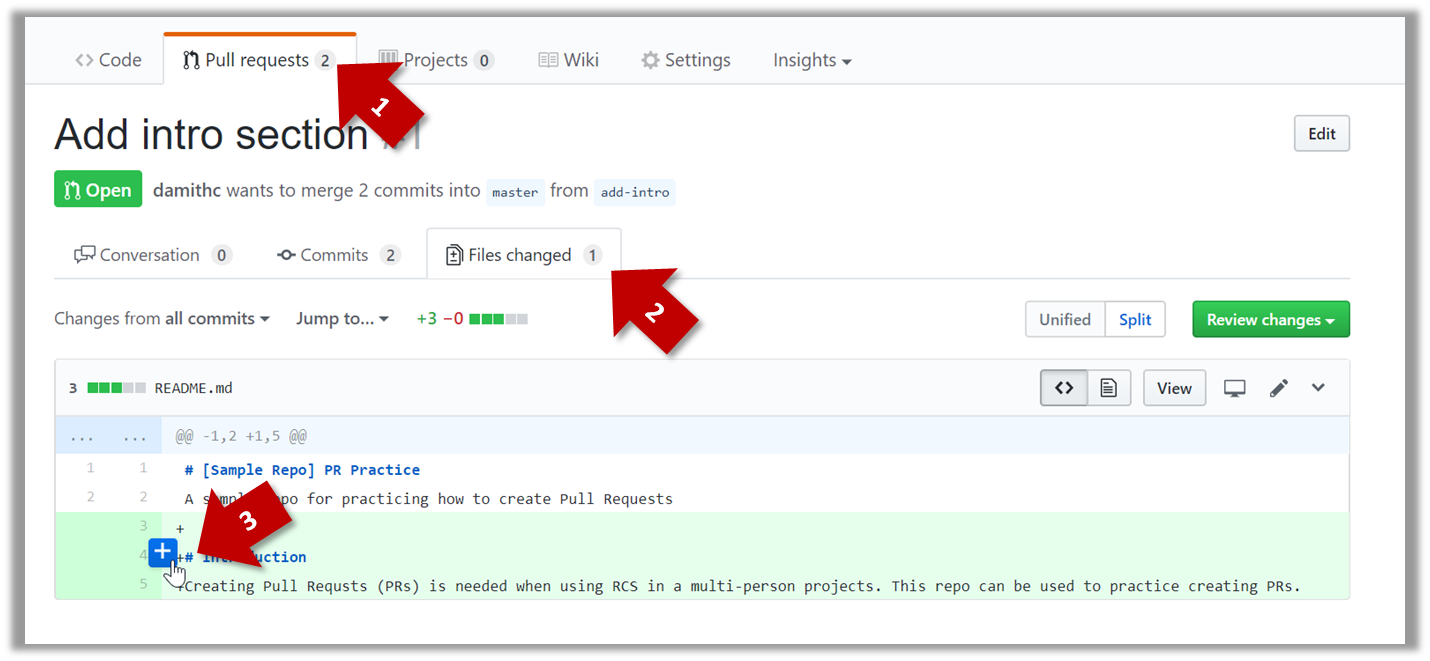
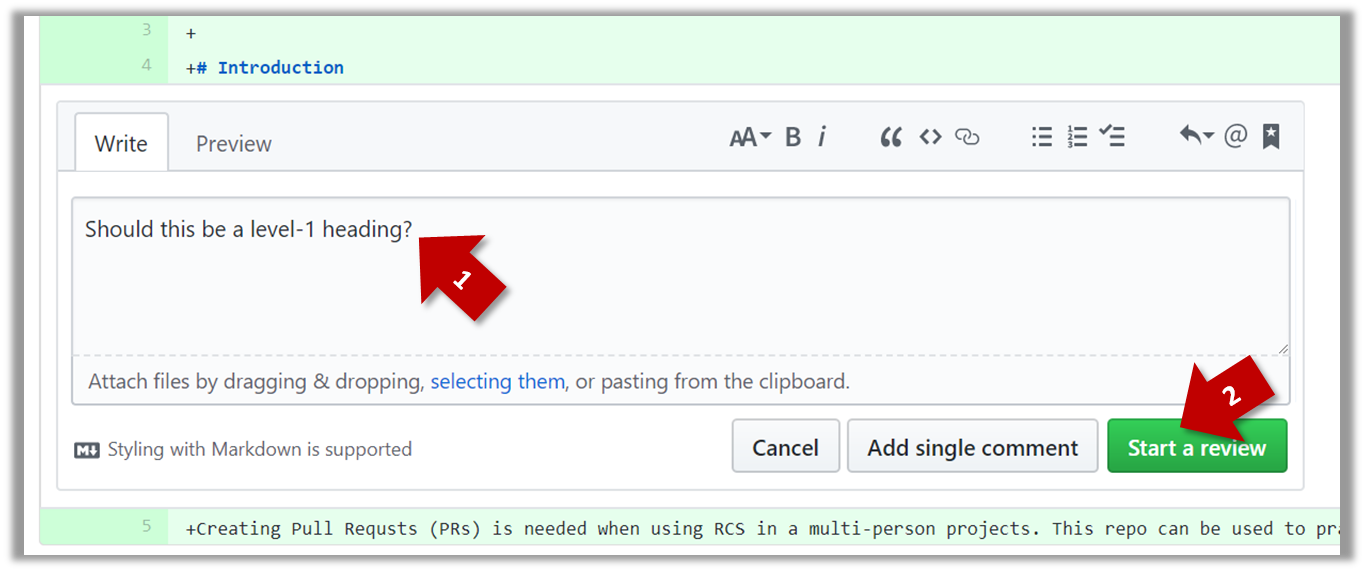
1a. Go to the respective PR page and click on the Files changed tab. Hover over the line you want to comment on and click on the icon that appears on the
left margin. That should create a text box for you to enter your comment.
1b. Enter some dummy comment and click on Start a review button.
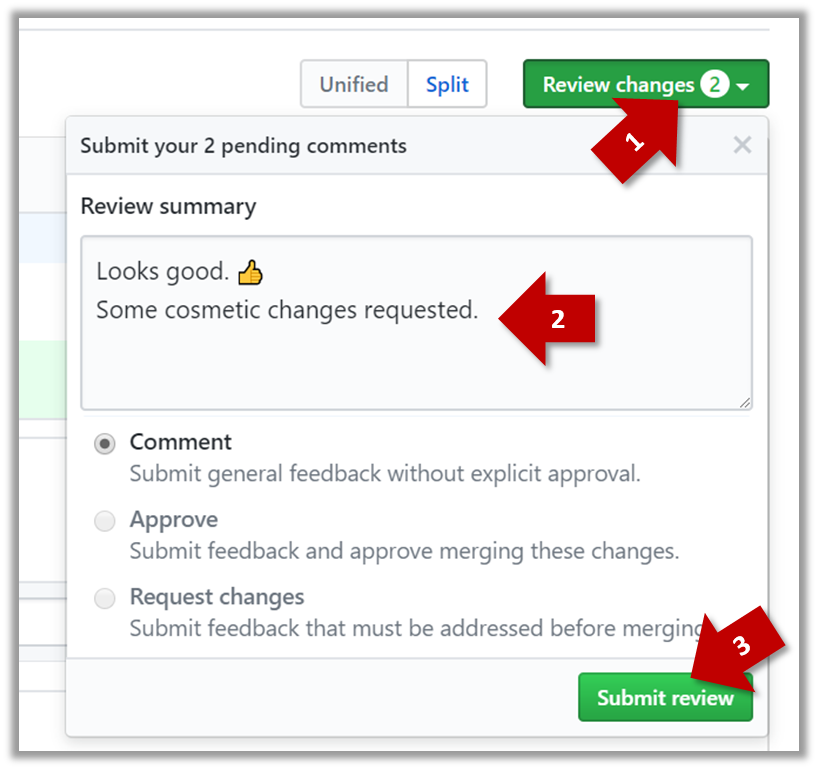
1c. Add a few more comments in other places of the code.
1d. Click on the Review Changes button, enter an overall comment, and click on the Submit review button.
2. Update the PR to simulate revising the code based on reviewer comments. Add some more commits to the add-intro branch and push the new commits to the fork. Observe how the PR is updated automatically to reflect
the new code.
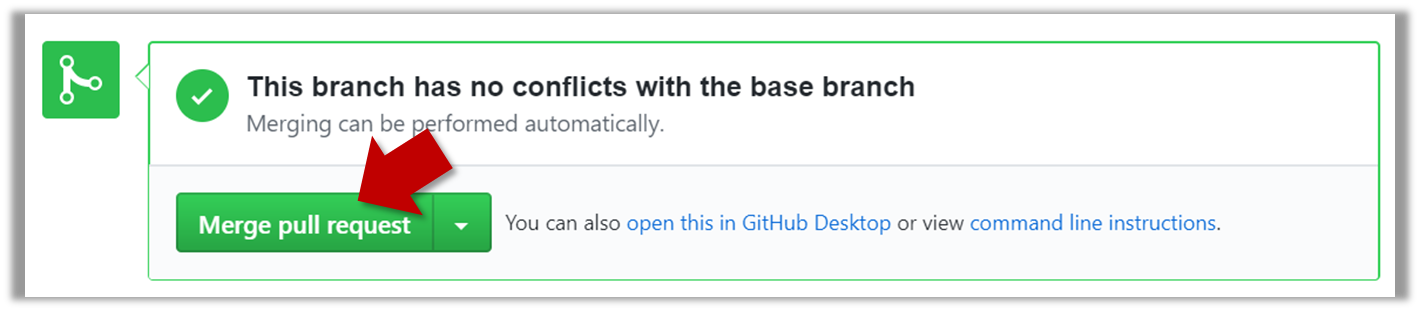
3. Merge the PR. Go to the GitHub page of the respective PR, scroll to the bottom of the Conversation tab, and click on the Merge pull request button, followed by the Confirm merge button.
You should see a Pull request successfully merged and closed message after the PR is merged.
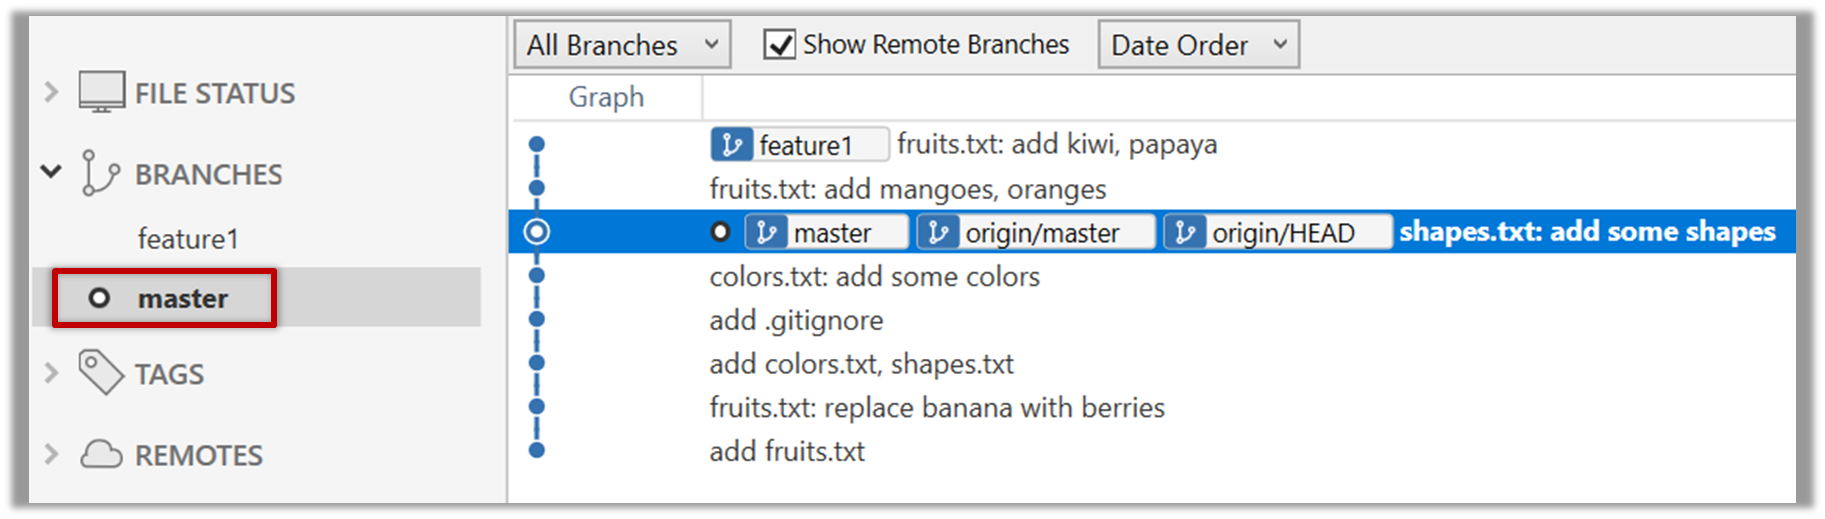
4. Sync the local repo with the remote repo. Because of the merge you did on the GitHub, the master branch of your fork is now ahead of your local repo by one commit. To sync the local repo with the remote repo,
pull the master branch to the local repo.
git checkout master
git pull origin master
Observe how the add-intro branch is now merged to the master branch in your local repo as well.
5. De-conflict the add-summary PR
that you created earlier. Note that GitHub page for the add-summary PR is now showing a conflict (when you scroll to the bottom of that page, you should see a message This branch has conflicts that must be resolved).
You can resolve it locally and update the PR accordingly, as explained below.
5a. Switch to the add-summary branch. To make that branch up-to-date with the master branch, merge the master branch to it, which will surface the merge conflict. Resolve it and complete the merge.
5b. Push the updated add-summary branch to the fork. That will remove the 'merge conflicts' warning in the GitHub page of the PR.
6. Merge the add-summary PR using the GitHub interface, similar to how you merged the previous PR.
Note that you could have merged the add-summary branch to the master branch locally before pushing it to GitHub. In that case, the PR will be merged on GitHub automatically to
reflect that the branch has been merged already.